Architectural Photography in Black & White

For many clients of architectural photography, black and white can be used to show the form and function of a building, without distractions of colour. Thus, the viewer is more taken with the actual design of the building and how it is situated and relates to it's environment. 

Newcastle Riverside

Even in the world of Real Estate photography, this technique can be used to add a dramatic vision to the properties and offer the agent something a little different that may be remembered by the people looking for houses. Whilst the majority of images do need and have to be in colour a selection of black and white, given an appropriate property, may help to sell the house to a discerning viewer.


Adelaide Properties

In architecture photography the focus is usually more on form and structure than on colour. This makes many images particularly good candidates for black and white conversion. In today's digital world this conversion is relatively straightforward using proprietary software. What is difficult to master is subtlety and the play of contrast, light and shade in the finished image. A large part of this skill also lies with shooting the images to be converted with an eye on contrast and how this will come out in the finished image.
Altitude Apartments, Adelaide

In many ways shooting for black and white is a skill that harks back to the days of film and darkrooms where limited post-processing was used. To get the image as perfect 'in-camera' as possible will lead to a much more satisfying result, which no matter of post-processing can make up for.

Adelaide House

Thus, by the use of black and white and creative camera angles, even a humble bus station can be shown as a beautiful design - something the architect would be proud to say!

Adelaide Central Bus Station

Adelaide Superdrome

Of course, one bonus of the digital age is the ability to play with the images and use techniques such as Selective Colourisation. This can add another dimension to an image:

Lake Tekapo, NZ

If you would like to see more of my Architectural images please go to:

Using HDR Efex for Interior Architectural Photography

Interior architectural photography, for architects, designers, real estate etc presents some challenges for the photographer. As in all photography, control and quality of light is paramount. Lots of time and money has been invested by designers, architects and builders in the use and effect of windows and lighting. As a photographer it is our job to represent those aspects to the best of our ability.

In the old days, this was accomplished with the use of elaborate lighting setups. Firstly tungsten, then leading up to the powerful and portable flash arrangements we use still today. With the advent of digital photography, it became easier to modify images after having taken the. This paved the way for the development of HDR (High Dynamic Range) photography. This allowed the combining of images to be blended together to show the full dynamic range (from full shadow to full highlight) in the one image. In the beginning this led to very surreal effects that bore little resemblance to actuality. Today, very advanced software allows for the use of this technique to be much more realistic.

Why HDR?

So why would you use this HDR technique to photograph interiors In my work, the primary reason is because it allows me to produce an image which is as close to the actual scene. By this I mean all the lighting, both natural and electrical, is shown as it is in reality. Whilst this could be done with using flashes, either large or Speedlite setups, this method is more reproducible and much more cost effective to me, and to the client. Also it removes the possibility of mistake leaving harsh shadows, colour casts and other issues that can arise with the use of flashes.

Technique

the basic technique of HDR photography is to take a series of bracketed shots and put them together using software. My workflow for this is:
  • Camera is fixed to tripod with remote release cord attached.
  • Camera is levelled using electronic level on screen.
  • Scene is metered for middle exposure of room. This is in AV mode @ 100ISO using shutter speed to achieve correct exposure with a fixed aperture.
  • Using the Auto-bracket function, I set this to either +/- 2 or 3 stops. This depends on how much difference there is between the brightest and darkest part of the image.
  • I usually take a series of 3 or 5 shots depending on the scene.
  • Import the images into Aperture after storage on HD.

Software

I have used Photomatix in the past, but over the last couple of years I have been using HDR Efex by Nik Software. I have found this to be much more user friendly and also more subtle in its method effects and tone processing.

Once the 3 images are selected and imported into HDR Efex, you are presented with the following workspace:

This shows the imported image in  the centre, with various built in presets down the left. To the right are the tools used to modify the image. This has settings for normal image control like contrast, exposure etc. and also tone compression and HDR method controls.

The default setting that is applied to the image when the window opens is remarkably effective as-is. Most of the presets are not much use for my needs as there effect is too extreme and therefore too obvious. You can also save your own preset once you have a series of settings you are happy with.

The first thing I usually do is adjust the sliders to achieve the correct exposure, contrast and saturation for the room. White balance is adjusted if needed once the blended image is back in Aperture. This will usually result in the windows being blown out and over exposed, in this case due to the time of the day, the windows were not so bright so just needed darkening a little. This is achieved through the use of 'Control Points' accessed through the panel on the right:
 Once you click on the 'Add Control Point' button you can click on the image and add one. What this does is allow you to selectively control parts of the picture in terms of exposure, contrast, saturation etc., as can be seen here on the right hand window:

So by lowering the exposure and playing with the other setting, you can drop the relative luminance of the brighter areas. What I have found is using many control points with smaller changes to each produces the most accurate result. As with all HDR work, it is a matter of trila and error to obtain the best settings for each particular occasion.

A handy feature is you are able to show a masking images that shows exactly where the control points are affecting:

 So by using the control points to modify the parts of the image you want, the control over the image is remarkable. You can easily achieve a realistic and accurate looking image in very little time:


In this case this is a subtle change but this technique works in almost all situations.

Once you are happy with the image, just click on 'Save' and a tiff of the modified image is saved and, in the case of Aperture, opened there. this can be further worked on there if needed. Sometimes it may need to be run through a noise reduction software (I use NoiseNinja) but if all exposures have been taken at 100ISO then it usually is fine unless the images is going to be displayed at a very large size.

The End

I hope this helps people interested in HDR for interiors. HDR has been given a bad name by some people for various reasons, mostly because of the surreal effect it can bring. As I have shown taking the correct bracket shots and subtle use of software tools provides extremely good results. If anyone would like more information on this, please let me know.

Low Light Event Photography with the 1DX

Had a couple of indoor events for the Halogen Foundation, a charity helping produce the young leaders of the future. various speakers appear and speak on leadership.


Was a good tryout for the low light, high ISO and focusing properties of the 1DX. All in all it seemed to do pretty well!


I started off playing about with setting the ISO, but given changing lighting conditions and the darkness of the arena, compared to the stage, I wanted to control shutter speed and depth of field as much as possible. In the end, using the auto ISO setting was the easiest way to accomplish coverage of all the differing luminances. The values produced ranged from 3600 up to about 20000! Given the high end of this range, there was surprisingly little noise present in the images. Obviously it was there in the shadows, but given the ISO speed it was quite remarkable. What this did allow of course, was the ability to gain depth of field when needed and provide a shutter speed at which all shots on all lenses could be comfortably hand-held.


In terms of focusing in the dark arena conditions, sometimes the camera did flater, but given it was almost too dark to see the crowd, it was still impressive without and AF-assist beam of some kind. Fast glass helps of course, but even the best have their limitations - MF to the rescue.


In terms of white balance, I did start using the Tungsten setting, which worked well for the first event where the lighting was almost exclusively that. However the second event was an awful mix of Tungsten for the stage and low-light fluro and Tungsten on the audience. Talk about a rock and a hard place! In the end for those shots I just shot Auto WB, which gave a faithful rendering for most, but some required a tweak in Aperture afterwards.


In terms of pure WB for the stage lights, the Tungsten setting worked perfectly and colour was rendered very accurately.


The dynamic range of the 1DX was very large, which allows for beautiful gradation of tone in both the shadows and the highlights. This is definitely the best low-light camera I have ever used. When combined with f2.8 L lenses, I cannot hope for a better combination and provides the option of coming back with shots that would not have been possible before without supplemental lighting. the naturalness and colour rendition is second to none in the Canon stable.

Loving the 300!


Been experimenting with the Canon 300mm f2.8L IS over the last few cycling events Thought I would share some of the results and my thoughts on the use of this lens with the 1DX.


The first thing about the lens to think about is the weight. Whilst heavy it is hand-holdable, aided by the IS which allows me to use speeds down to around 1/125 with sharp results. This is helped by the balance the heavy 1DX gives to the combination. Given the 1DX's excellent low-noise ISO results there is a lot of variation in the aperture and shutter speed that can be used. I often increase the ISO to give a slightly more forgiving aperture, which allows a little more leeway in focusing on a fast moving cyclist. this still provides impressive narrow depth of field and excellent out of focus backgrounds.


What is so impressive about this combination is the speed of focusing. The lens is very quick to snap onto the focus point and tracks really quickly and accurately  provided I am quick enough to follow the action with the lens! Whether this is due to the lens or the body I am not sure. As my lens is a Mk l version it may be down to the amazing autofocus of the 1DX.

An interesting use I have been trying is to compose images of the riders in the environment, such as the one below. Again the amazing background blur provides a beautiful backdrop to the cyclists.


A difficulty of photographing outdoor sports is the lighting. Usually the riders faces are in shadow, I could use some kind of flash extender with the 300 to help but I have found increasing the Exposure Compensation by +1 stop really opens up the light on the faces and also lightens the background for a pleasing result. For other focal lengths I use fill-in flash at times, but the 300 and this combination provides results which please me and the riders who have commented on the images.


Hope you like the images and this bit of background on the equipment, if you have any questions or comments, please feel free to type away!

What's In the Bag?


Lots of people ask about what gear I use, so I thought I would do a quick post on the main bag I use for transportation and the gear I generally use for most commercial jobs.

The Bag

My primary bag for both storage and transportation is the Airport International v.2 by Think Tank.
Think Tank Airport International v 2.0

This meets airline size requirements for international carry on luggage. I am yet to travel overseas with this bag, but given the weight issue of the equipment carried, I imagine it would take some wrangling at the checkout to get it allowed in the cabin!

However I do use the bag for vehicle journeys and it proves to be a great bag to both wheel and lug about, thanks to the quality skateboard wheels and many grab handles around the bag. The handle has been described by some as rather flimsy  but I have had no issues and the fact that it collapses down into a relatively small length frees up space in the bag for more gear.

As with all Think Tank equipment (I also use the modular system and belts) construction, quality and attention to detail are first class. backed by an excellent guarantee policy, the company really has set the benchmark for camera luggage and accessories. I have used many brands in the past but few come close to the offerings from the US based firm.

I also use this bag as the main storage for equipment at home and if I don't need all the gear, decant equipment as needed to either a LowePro backpack or ThinkTank modular system depending on needs when I don't need the full set of equipment.

An additional feature of the bag are two locks, one for the zips to be locked down by and another in a  pocket on the rear of the bag that is a lock on a chain that can be used to tether the bag down to an immovable object. this would be fine for casual use, but may not prove a strong deterrent to a planned theft. If the bag does go missing it has been registered with Think Tank through their website with a unique serial number and address details, so may find it's way home!Also available ar a series of straps that hold a tripod or monopod safely to the side of the bag.

For a normal commercial or sports shoot, this is the usual load:


As I said, the minimal length of the collapsed handle allows a 70-200 to stand upright in the end of the bag, as well as deep sidewells down both sides that take 1D bodies and large glass. The side of the bag does bow out a bit due to the size of the hood of the 300mm, but the quality zips used seem to hold everything together with no problems!

In the lid are 4 see though pockets that are used for various small items, such as straps, batteries, cables and such things. In another case I have various flashes, modifiers, cords, cables, batteries etc. Also on the front of the bag is  both an open flap pocket that I use for a grey card,flash gels and occasionally a MacBook and a small zipped pocket which holds tools and general accessories. A Pixel Pocket Rocket holds all my memory cards (an ever expanding collection!) and is kept in a small zipped pocket under the handle on the top of the bag, underneath the clear plastic business card holder.

All in all the Airport International perfectly suits my needs at the moment. The bag is extremely well made, easy to divide into compartments for whatever gear you need and very easy to wheel and get around with. If more gear is ever purchased then something like the Logistics Manager may be needed for storage- better get those commissions coming in then!

To check out Think Tank and their range of bags and accessories go here: http://www.thinktankphoto.com/

SpecializedSA Womens Team Photos


Was asked to help out the Specialized ladies with some team photos at the recent Santos Women's Cup, which was won by National Criterium Champ, Kimberley Wells.

Was pleased to be able to help and good luck for the coming season!


New work for national magazine - Kitchens & Bathrooms Quarterly

On architectural jobs like these the combination of using 'Live View' on the 1DX LCD screen and the new 17mm TS/E lens is as perfect as you can get at the moment with Canon equipment.


Using the large LCD monitor on the back of the camera allows the viewing of a much larger image than the viewfinder. It also allows the overlaying of a grid on the screen, which allows for the lining up of vertical lines to keep everything straight which is a must in architectural photography.


Another benefit is that you can zoom into the image on the screen to precisely check the focus of the image. This is very useful when using a manual focus lens like the tilt and shift lens above. This lens again allows for movement of the lens to keep verticals straight and allow precise framing and focus control throughout the image.

With many architectural jobs, the range of light in the image can be very wide, from full sun to dark shadows. Whilst modern cameras have very wide dynamic ranges, it is still impossible to capture all the tones in one image without using quite powerful and expensive lighting. A way around that is to take a series of images and combine them to create one picture.

Using a program such as HDR Efex from NikSoftware, allows the combination of a number of images (I use 5) ranging from correctly exposed highlights through correctly exposed midtones to correctly exposed shadows. These are then combined to create an image that best represents the complete scene. Note: care must be taken not to overdo the effect which can lead to an unreal and false looking image.


Santos Women's Cup 2013

Run in conjunction with the TDU, the Santos Women's Cup brings together the best Australian female cyclists for a series of three races, promoted by CyclingSA.

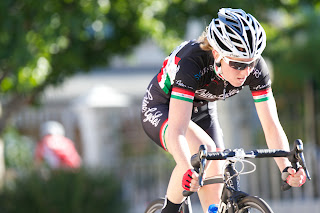
Great to see top class women's racing and crowds there to support it. Series well won by Kimberly Wells from the SpecializedWomenSA team.

A few images from the racing below: